
Quick Tech Tips from Photo Restoration Pros for Bringing Damaged, Dusty Family Photos Back to Life
Every family has some. They may be dusty or damaged by water; they may look worn or well-loved. They’re diamonds in the rough! Whether you’ve got two or two dozen, there’s nothing quite as alluring as old family photos that need some serious TLC. It’s like discovering an antique that needs some sanding, polishing and refinishing to look lovely again! Photo curator and restoration teacher Denise May Levenick advises, “when tackling any preservation project, proceed with caution and take time to educate yourself about archival supplies and methods before jumping in to reclaim an artifact.” And she’s right: photo restoration is a process that presents the practitioner with a never-ending series of challenges. The good news is that many old photos can be brought back to their former glory. Following are some quick tech tips from photo restoration pros for bringing damaged, dusty family photos back to life.
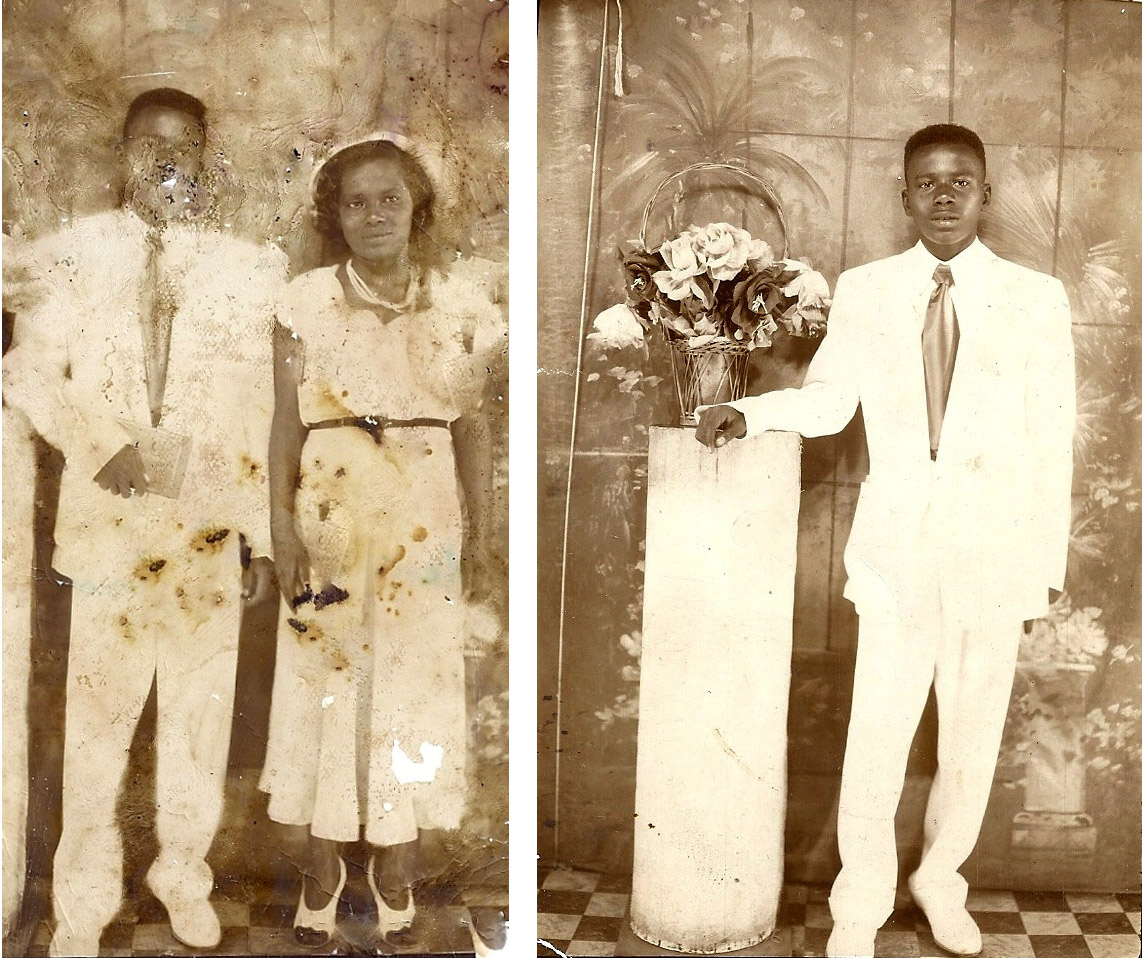
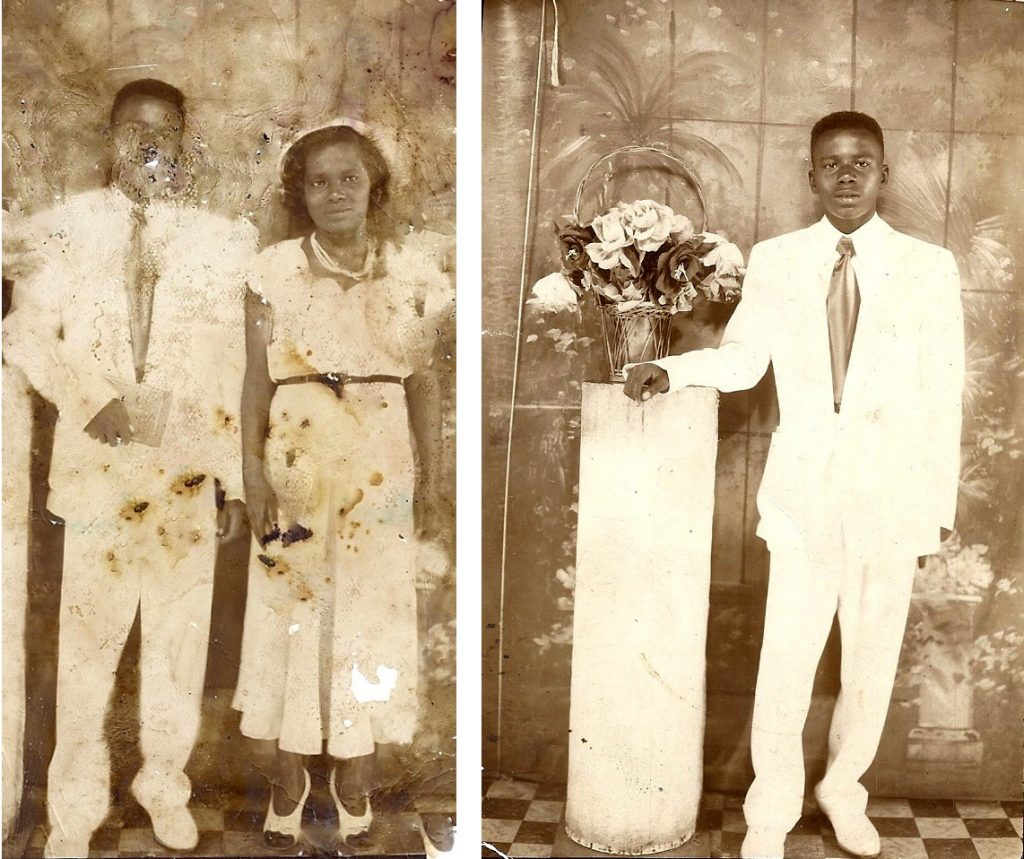
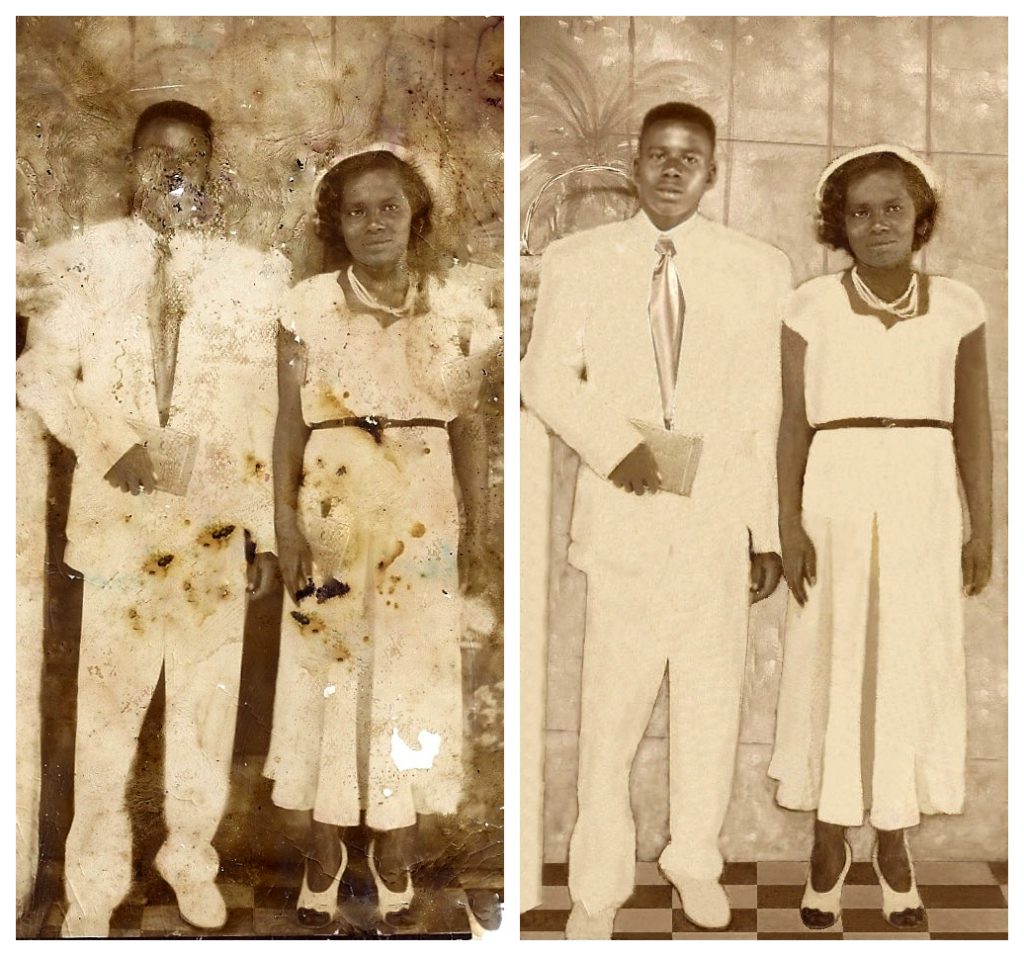
Whether a photograph can be restored successfully depends on a number of factors, some of which the owner of the photograph can help control. Below (left) is a photo we received from a client several months ago. It presented two challenges – one is immediately apparent, the other, not so much. Below (right) is a secondary photo we received from the same client, which helped us tackle this tricky restoration project. Read on to see how we worked with our client’s two photos to create an heirloom piece for their family to pass on to future generations.
- Resolution and Restoration Go Hand-in-Hand: The most obvious problem with this old photograph is that the man’s face is partially damaged. The other difficulty is that the photo was presented to us as a JPEG file, which had been scanned at 300 dpi (dots per inch). If you just want to view a photo, a scan density of 300 dpi is fine, but when it comes to trying to restore a photo, a higher pixel density is always better.
- Extra Photos Provide “Parts” for Fixing Damaged Pictures: In this case, where the man’s image was concerned, we were fortunate because our client had a second photograph, taken at the same time, of the young man in the photo. We were relieved about this because we could use the extra photo as “spare parts” for fixing the damage done to the original. This second photo actually helped us in two ways – we now had a clear image of his face, and a much better idea of the true appearance of the background in the photo.
Unfortunately, the pixel density of 300 dpi was something we just had to work with – we were not able to obtain the original photograph for re-scanning, and the client was not able to provide us with a higher-density scan. Still, even with the low density scan, we were able to produce a reasonably good restoration. See the final result below and let us know what you think!
This real-life example illustrates some important points to keep in mind if you have damaged photographs that you want to have restored.
- Whenever possible, provide any other photos that might contain information that is missing from the primary photo, such as faces, or other surrounding information.
- It is always best to provide the restorer with the original photograph(s) so that they can be scanned at the optimum pixel density.
- If you can’t– or don’t want to – provide the original images, always scan them at the highest possible density, to maximize the amount of information the restorer has to work with.
If you implement these quick tech tips from photo restoration pros for bringing damaged, dusty family photos back to life, you’re more likely to end up with a beautiful new family heirloom.
 About the Author: Frank Arnoth is a retired Senior Development Engineer who spent his career innovating at E. I. DuPont. His work for duPont entailed the design and development of a wide variety of specialized machines and processes. After retiring from duPont, he formed his own company, Design Solutions Inc., which carried out very similar functions for a variety of industrial clients. After closing that business and traveling, he decided to open a business based around his hobby – photography. That’s when he founded Digital Conversions LLC. Frank and his team provide a complete suite of scanning services for photographic materials, including slides of all sizes, negatives (including disc film), photographic prints and albums. The goal of the business is to providing scanning services that are both affordable, and high-quality, with resolution levels that are among the best in the industry. The business also provides photo restoration and retouching services.


2 Comments
neva says:
August 13, 2016 at 4:40 pm
THESE WERE INSIGHTFUL CONCLUSIONS WHICH GOES A LONG WAYTOWARDS ENLIGHTENING THEORDINARY INDIVDUAL MANY THANKS111
Image RESTORATION says:
July 28, 2018 at 8:45 am
Well described post. Thanks for sharing this useful informative tutorial about IMAGE RESTORATION. As always awesome content, I love reading your articles, much appreciated!